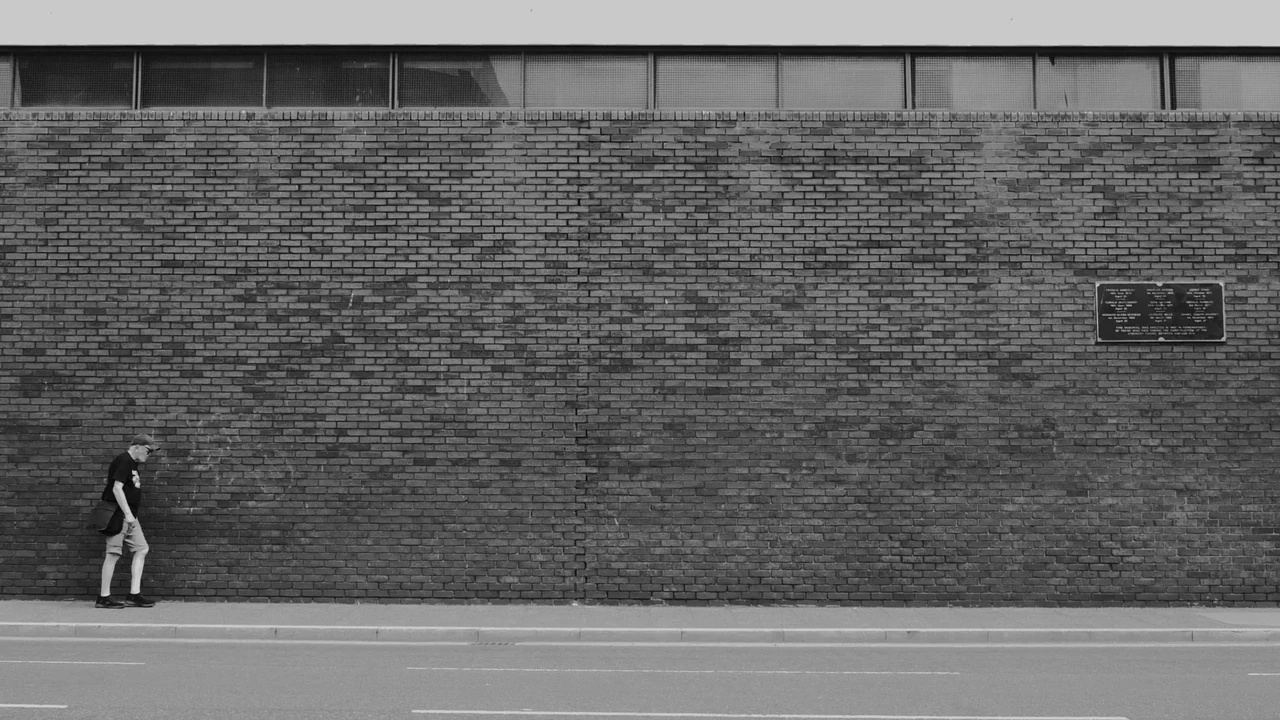
A person and a place
Start with the wall photograph. The figure is small, and the wall is allowed to be large. That scale is information. Ask what disappears if you insist that the person should fill the frame. Bigger is not automatically more intimate; sometimes it simply removes the place.
For the first exercise use a willing companion or an object. From one camera position, compare a wider and tighter field of view if your equipment permits. Then use one focal length and move. The first comparison changes framing; the second changes viewpoint and the relationships between distances.
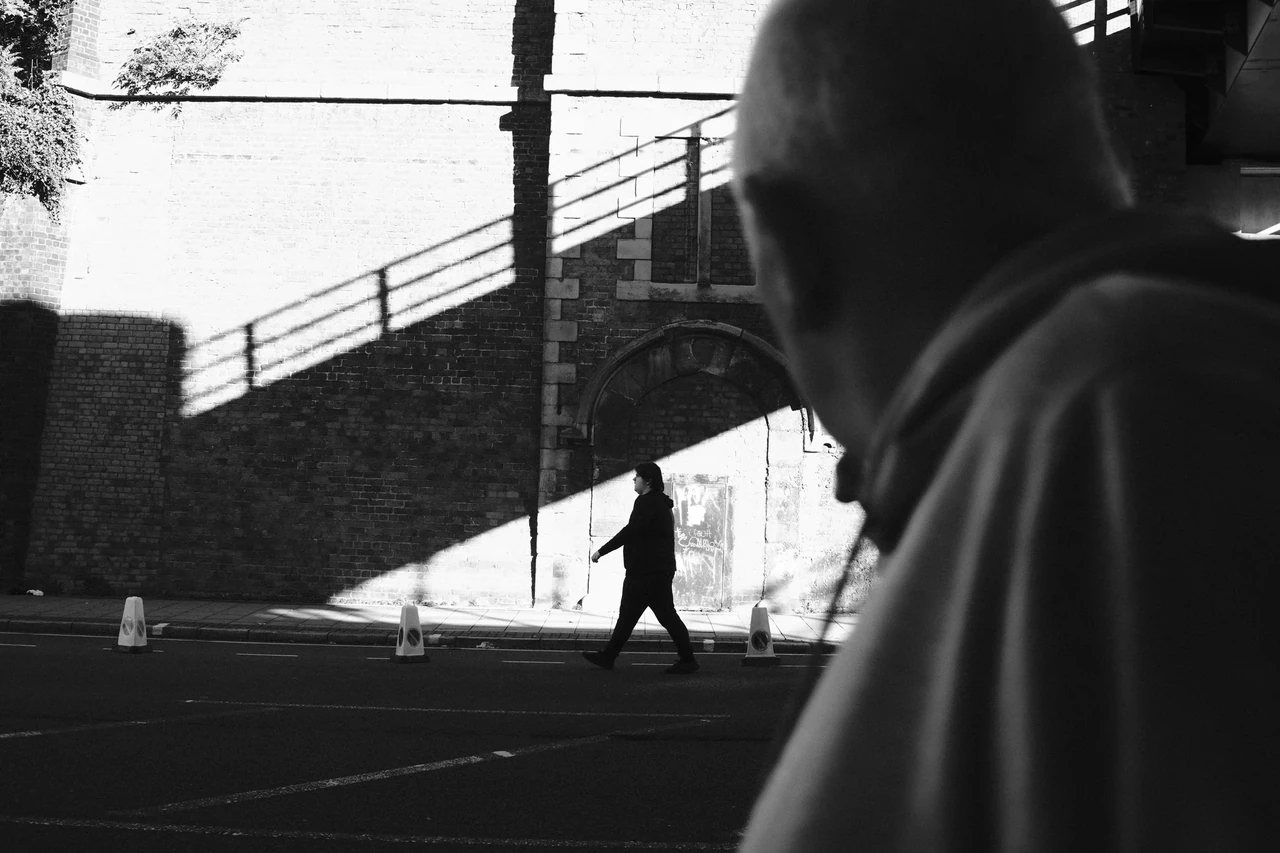
The foreground interrupts
A large, partly cut-off passer-by occupies the near edge while a smaller figure crosses the bright wedge beyond. Your eye has to negotiate two distances. The interruption makes the view feel occupied. Cover the foreground briefly and notice how much tidier—and less layered—the picture becomes.
Passing through the Frame · Photograph © Mark C GrantChoose a working distance
A wide view can include a lot of context and a lot of accidental rubbish. A tighter view can simplify, but may omit the relationship that interested you. Choose one lens for the walk so that you learn to anticipate what it includes.
Do not turn a focal length into a rule about how close you must get to people. A composition is not permission to crowd somebody. If the required position is intrusive, unsafe or blocks a route, change the picture. There are more streets.
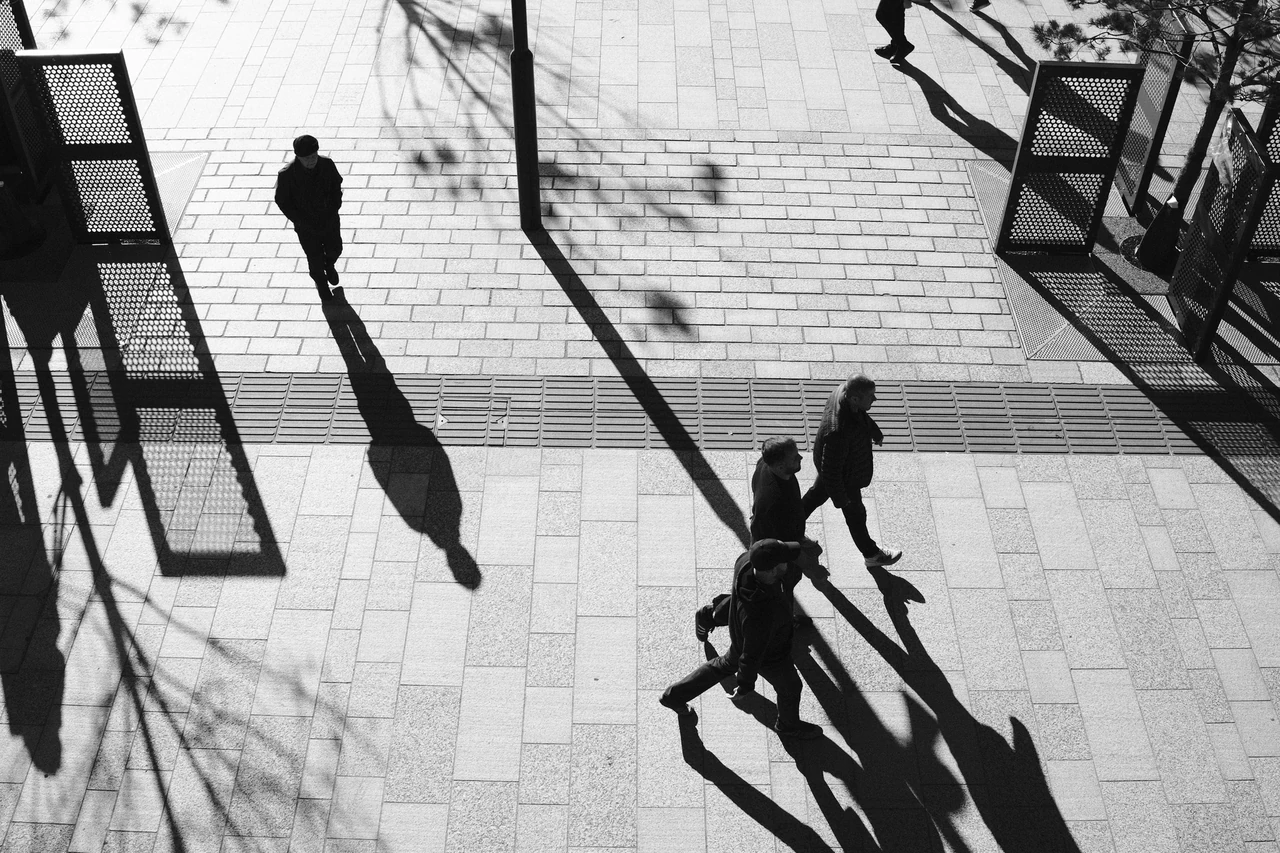
The figures draw on the paving
From above, people and their shadows become linked marks across a grid. The grid holds still; the bodies introduce directions and differences in scale. Follow a shadow back to its owner. The relationship is more interesting than calling the whole scene simply high contrast.
Long Shadows on the Concourse · Photograph © Mark C GrantWatch, then try
Take Better Photos Episode 7 - Composition

Look for relationships between elements rather than a grid to obey. Pause on a frame and name what changes if one object touches the edge.
Build two or three layers
Find a near shape, a middle-distance action and a background. They need not all be sharply described. In the foreground-interruption example, the large cropped figure makes you negotiate the smaller figure beyond. The picture gains a sense that the photographer shares the space.
Watch for unwanted mergers. A head touching a sign may be an accident; a repetition of shapes may be the whole point. Move a small amount and compare. Your feet often provide a more convincing edit than software pretending an inconvenient object never existed.
Press when the relationships become legible
Wait for a gap, a turn of a body or a shadow to separate. Do not assume the first frame is the only honest one. A short sequence can help you study timing, provided you keep looking instead of using the shutter as a substitute for attention.
Review the sequence small before zooming in. Name the difference between the best two frames: spacing, gesture, direction, overlap. If you cannot describe it, keep looking. The useful answer usually lives somewhere more specific than “cinematic”.
Review your photographs
- Does subject scale serve the idea?
- Are the important shapes separated or intentionally overlapped?
- Can you name a deliberate decision at each edge?
If it is not working yet
If every frame feels distant, explore a more involved viewpoint without crowding people. If every frame feels cramped, let the place back in.
Practical guidance from Captured Moment. Starting points to test in your own work, not universal camera settings.
Take this to the discussion.
A question, an example, a picture that proves us wrong. Specific beats loud.
Open the conversation ↗